ALWAYS GIVE CHARITY

Tutorial by Linda Fields

In remembrance of those lost, and of the kind hearted doing all they can to give, I dedicate this card, the last in the Three Virtues series, to the native people of Maui. God bless you. This neatly ties up anything I might have missed in the previous two tutorials with some added commentary.

All in the Details

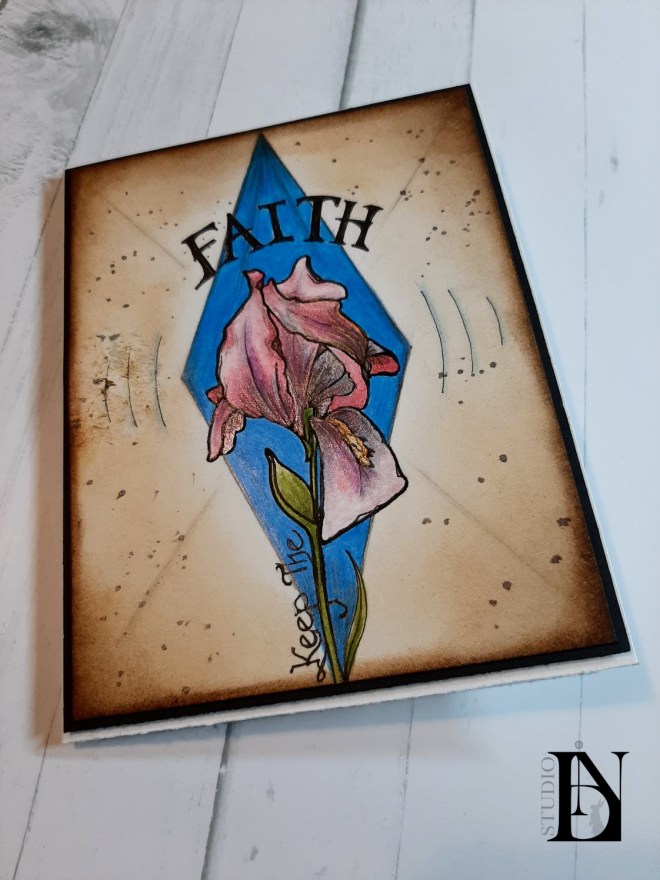
Altenew has some of the most beautiful flower stamps you’ll find anywhere but I like to broaden their versatility by adding details that aren’t in the stamps. Here’s where Micron drawing pens and mechanical pencils become must have tools in your creative arsenal! This stamp I used did not have the extended stem, didn’t have the tendrils or the large leaf at the base. I drew those in and you can too with a little practice. Leaves are very fun to draw.

Notice the lines in the flower? I added these to give added texture, movement and depth. Because I used colored pencil over the petals, I really need to go back in with the pen and redo those lines to make them pop.

Building Your Toolbox

Let’s break down some of these tools. I used the silver Compass to create the circles. The curved lines guided me when writing the main word for each card like “Charity” but you can use a compass for many things like finding the center using arcs. A great tool!

The grey blob on my Glass Media Mat is called a Kneaded Eraser. As the name suggests, you must knead it like a little piece of dough before using it to “pick up” unwanted graphite. Use it to create highlights or to clear up your paper. It won’t mar or ruin the surface. When the eraser becomes too saturated, just knead the graphite away and start again! You can even form tiny arms for fine details so you leave the rest of your illustration alone. Amazing tool. Past the paint brushes and colored pencil is a white Tortillion or Blending Stump. It’s tightly rolled paper used to smear and/or blend pencil marks. You can tear away what’s old and sharpen what’s worn! Last but never least are the Micron Pen and Mechanical Pencil. The right tool for the job is important and these are must haves.

Colored Pencils

Who hasn’t heard of Prismacolor Colored Pencils? They used to be my absolute favorite for laying down color but I must say, my dedication has been persuaded by another! I recently purchased a wonderful set of colored pencils by Castle Arts. Besides being reasonably priced, they are incredibly soft with rich, vibrant colors that don’t break or crumble! The 120 set I got from Amazon was only $60 dollars and it came in a portable zipper case with pages that flip while holding every pencil in place. These pencils are amazing.

The Three Virtues

I’m in the last stages of certification in Altenew’s Educational Program (AECP) so I’ve been creating a lot of cards, my last being the Three Virtues set. I began with Hope, created Faith and finished with Charity. I used watercolors, colored pencils, inks, drawing pencils and pens. I love the finished set.

Keep the Faith
There’s Always Hope
Always Give Charity

KEEP the FAITH

Tutorial by Linda Fields

How incredibly difficult it must be for the people of Maui – to persevere in the face of such horrific devastation and loss. I admire their courage, and above all, their faith. This card continues where my last tutorial, Psalms of Hope, left off – remembering those who are suffering.

I dedicate this card to the native people of Maui.

A Test of Faith

It took several steps of faith to create this card. I doubted my ability to even do it. I absolutely love watercolor painting but this is new territory for me. It’s not enough to learn a technique, it must be applied and continually practiced to be perfected. Did mistakes happen? Yes they did, but I persevered! I was determined to create a card I could proud of. In this tutorial I’ll point out my successes as well as mistakes because that’s how we can all learn and grow.

Into the Light

Slide to Compare the Before vs. After

Light, the very essence of Faith, became my inspiration for the medium I used. I used Metallic Watercolors to paint the Iris above. It’s difficult to photograph to show exactly what happens but compare the before and after to see how light reflects off the tiny metallic particles in the paint – changing everything you saw in a whole new way!

Materials

  • Watercolor Paper (Hot Press 140 lb)
  • Mechanical Pencil, Blending Stump, Gum Eraser, Compass, Ruler
  • Sakura Micron Drawing Pen
  • Altenew Paint-a-Flower: Iris
  • Metallic Watercolor Set
  • Castle Arts Colored Pencil – Cerullian Blue
  • Round Watercolor Brushes 1 & 3
  • Tim Holtz Distress Inks – Black Soot, Ground Espresso, Vintage Photo

Color Spectrum

The colors you choose are just as important as your design layout. Do the colors play nice or do they fight to dominate each other? Do the emotions they invoke match the story you’re trying to tell? I wanted to show courage, will power and determination so I chose a bright, bold blue for the backdrop. I stamped the delicate, beautiful Iris from Altenew because the flower always returns despite it dying off every year. I chose complimentary, soft pink and purple hues to represent it’s fragile yet strong willed nature. I painted layers of watercolor, finishing with colored pencil and pen details with graphite for depth.

Base Layer of Metallic Watercolor Soft Pink

I started with a soft pink but had problems from the start. I was doing a wet in wet technique but the paint didn’t vein and spread. If your paper soaks up too much of the initial water you lay down then the paint can’t move. The paper you choose makes all the difference! You can also “stretch” your paper in advance – something I did not do. Get your paper soaked with water, laying it down and securing it with tape and/or stapling it to a board until it dries naturally. In doing this, when you’re ready to paint, the water will sit instead of soak into the paper fibers.

TIP: Work in layers, building up the color for depth, adding water to lighten it.

Added Purple for Depth and Interest

TIP: Use a separate piece of the same paper to test your colors – something I didn’t do.

Color Blue Added to Backdrop

TIP: A different medium can add texture and interest. Colored pencil leaves a soft, velvety look.

Stem & Leaves Colored

TIP: Use a darker color for the recesses or things in shadow. Add graphite to deepen it.

Finishing Touches

After erasing all the unwanted lines, after painting and coloring my card, after I was satisfied with the Micron Pen details and added pencil shading, it was time to transform the paper. I used Tim Holtz Distress Inks to darken and age the edges. I like to hold my paper up when using the applicator to give added texture. I didn’t have enough water on my brush when creating the black splatters so I hit the brush a little too hard, lost control, and ended up with an ugly black smudge across the card. It was terrible but I didn’t give up and scrapped off the top layer of paper instead. Yes, it left a bit of a bruise but it added to the overall vintage charm.

Black Splattering with Distress Ink & Water

Persevere

Your patience will pay off. Practice! It’s the only way to learn. Time does much for those willing to stick it out. Keep the Faith! For it will become more beautiful than you could have ever imagined.